LobbyGuard allows you to create your own list of “visitor types” e.g. employee, student, contractor, parent, etc. giving you the capability to track any type of walk-in traffic to your facility. You will also create a list of reasons (known as “Reasons for Visit”) for this particular type of visitor to be in your building or facility. As an example you might a have visitor type called “Contractor” and for that visitor type you might have reasons for visit such as “Work Order”, “Making a Delivery” and “Meeting”.
Once you have set up your visitor types and reasons for visit you will create a “workflow” that defines the set of questions or inputs that you would like to present to a particular visitor type and reason for visit. For example you might want to take a photo, run a background check and print a visitor badge for a “Contractor” who is here for a “Meeting”. This flexibility allows you to tailor the LobbyGuard visitor experience specific to the needs of your environment.
Step 1: Create the Visitor Types
Visit frontdesk.lobbyguard.com from your web browser and log in with your LobbyGuard FrontDesk account. If you do not yet have a LobbyGuard FrontDesk account click here to learn how to create one.
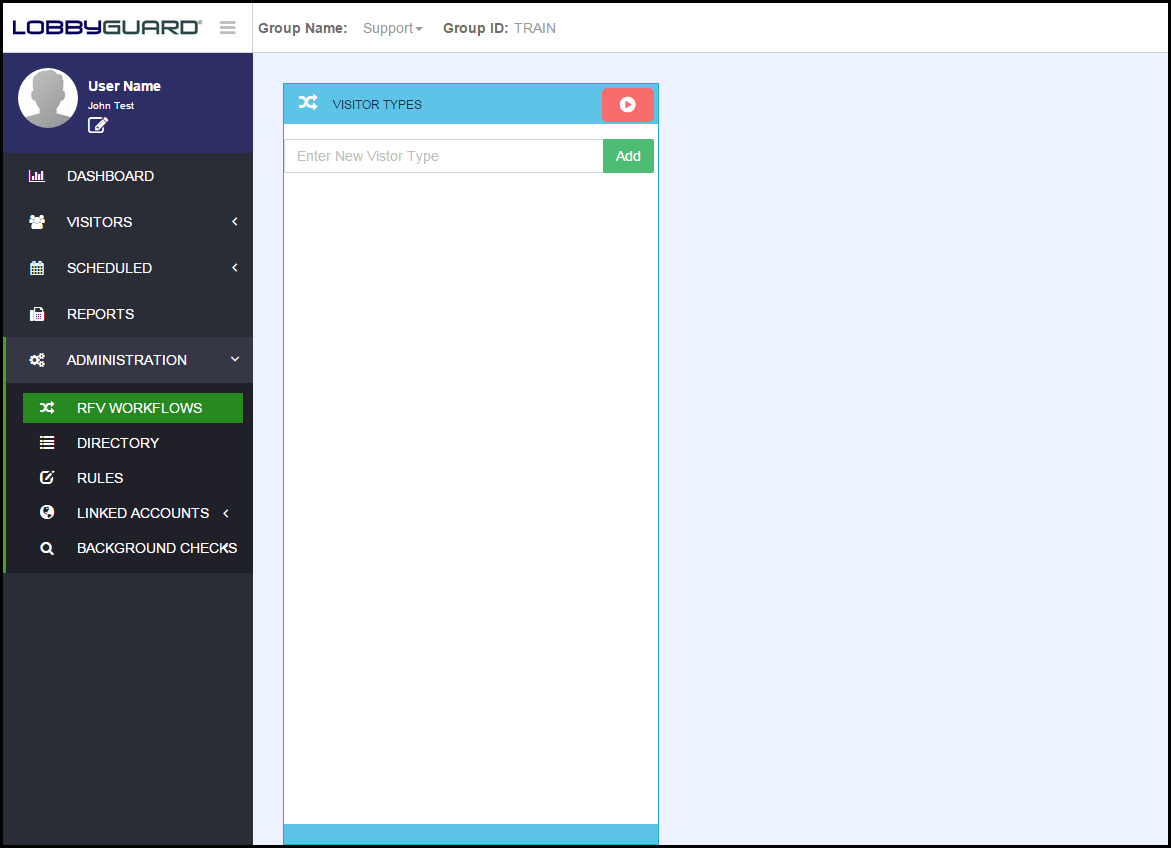
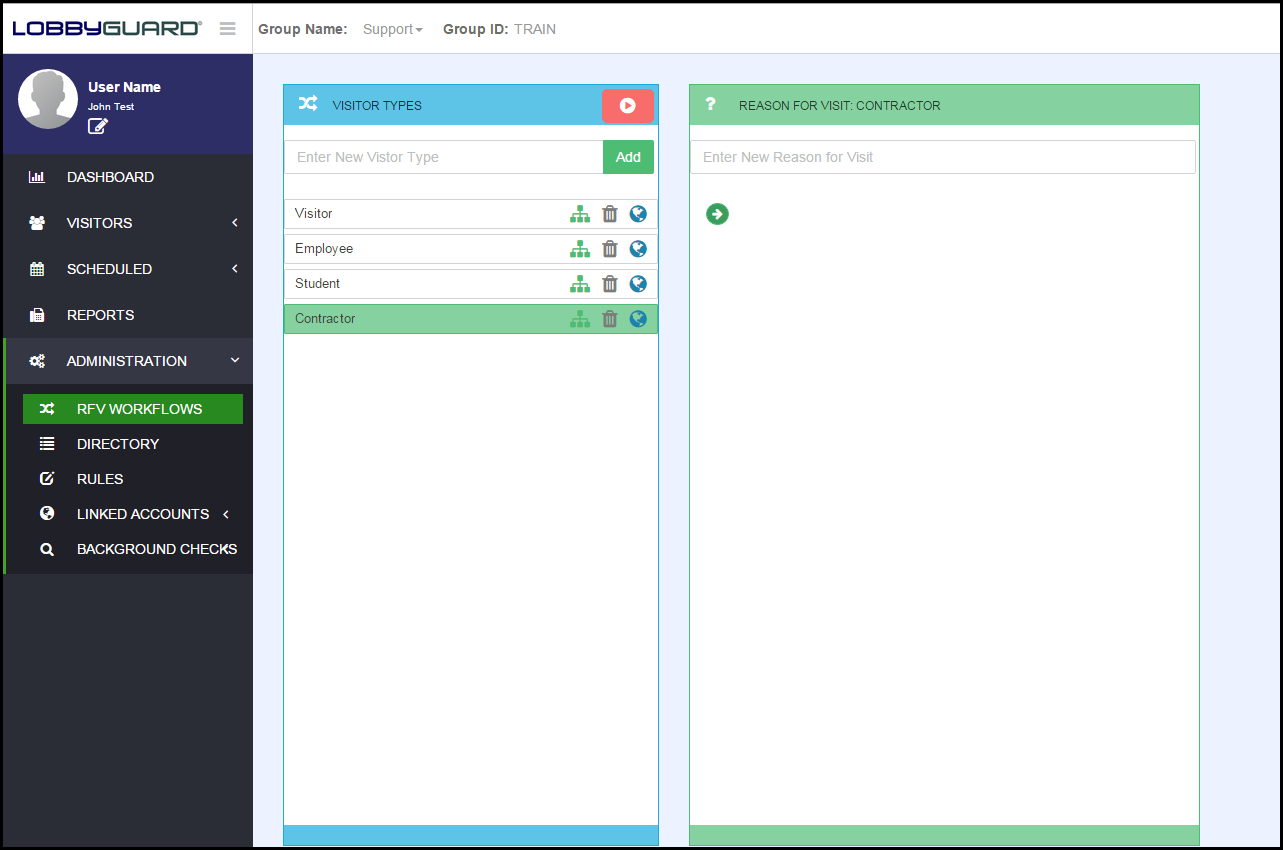
Once you have logged in click "Administration" on the left side of the screen then click "Workflows". You will see the "Visitor Types" column appear as shown below:
Enter the type of visitor you wish to track in the "Enter New Visitor Type" field and click the green "Add" button. Repeat this process until you have created as many visitor types as needed for your building or facility. It is recommended you create not more than 5 visitor types in order to prevent confusion or difficulty for your visitors during the sign-in process.
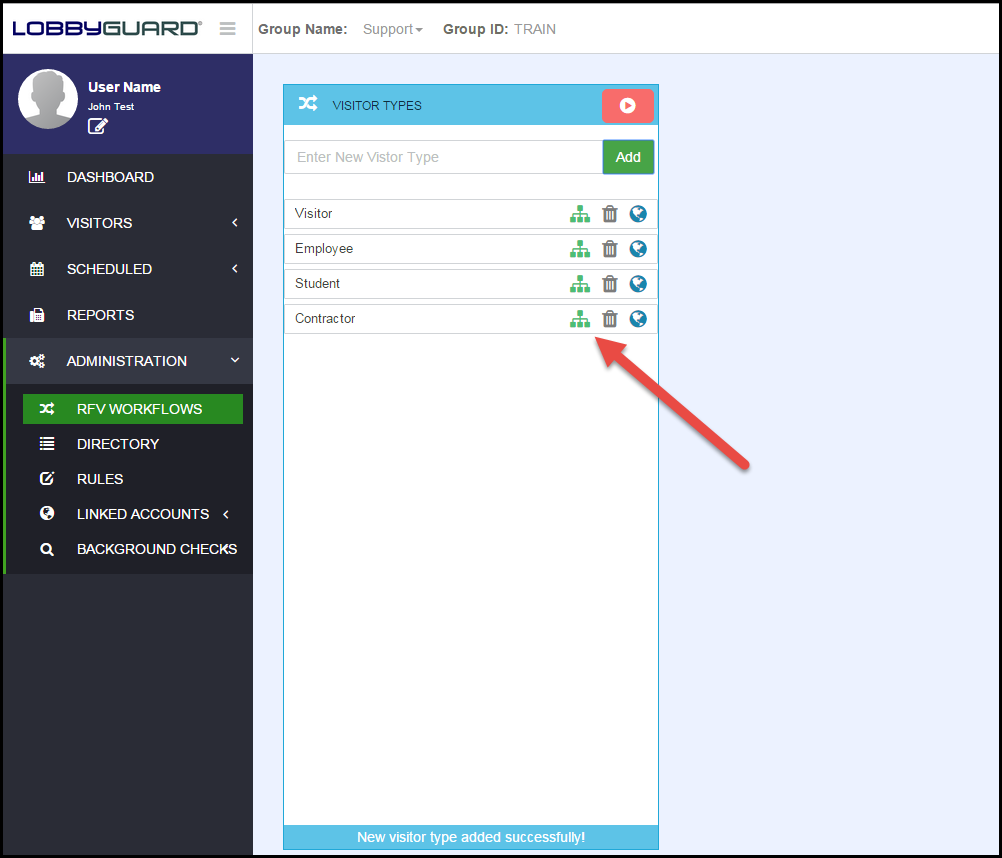
When you click the ADD button you will see each new visitor type added to the bottom of the list as shown below:

Click the green icon located to the right of one of visitor types:
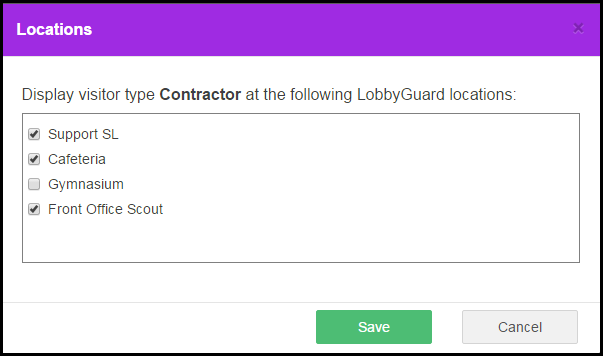
You will see the LOCATIONS dialog as shown below. Select the kiosk(s) on which this new Visitor Type should appear as a selection and click Save. The list of locations will consist of all the installations of LobbyGuard that you have in your LobbyGuard Group. In the example below there are 4 LobbyGuard kiosk locations: Support SL, Cafeteria, Gymnasium and Front Office Scout locations. The visitor type "Contractor" will appear as a selection on the Support SL, Cafeteria and Front Office Scout kiosks and will not appear as a selection on the Gymnasium kiosk. This new visitor type will only appear as a selection on the kiosk(s) you choose. Click SAVE to save your settings.
Step 2: Create the Reasons for Visit for each Visitor Type
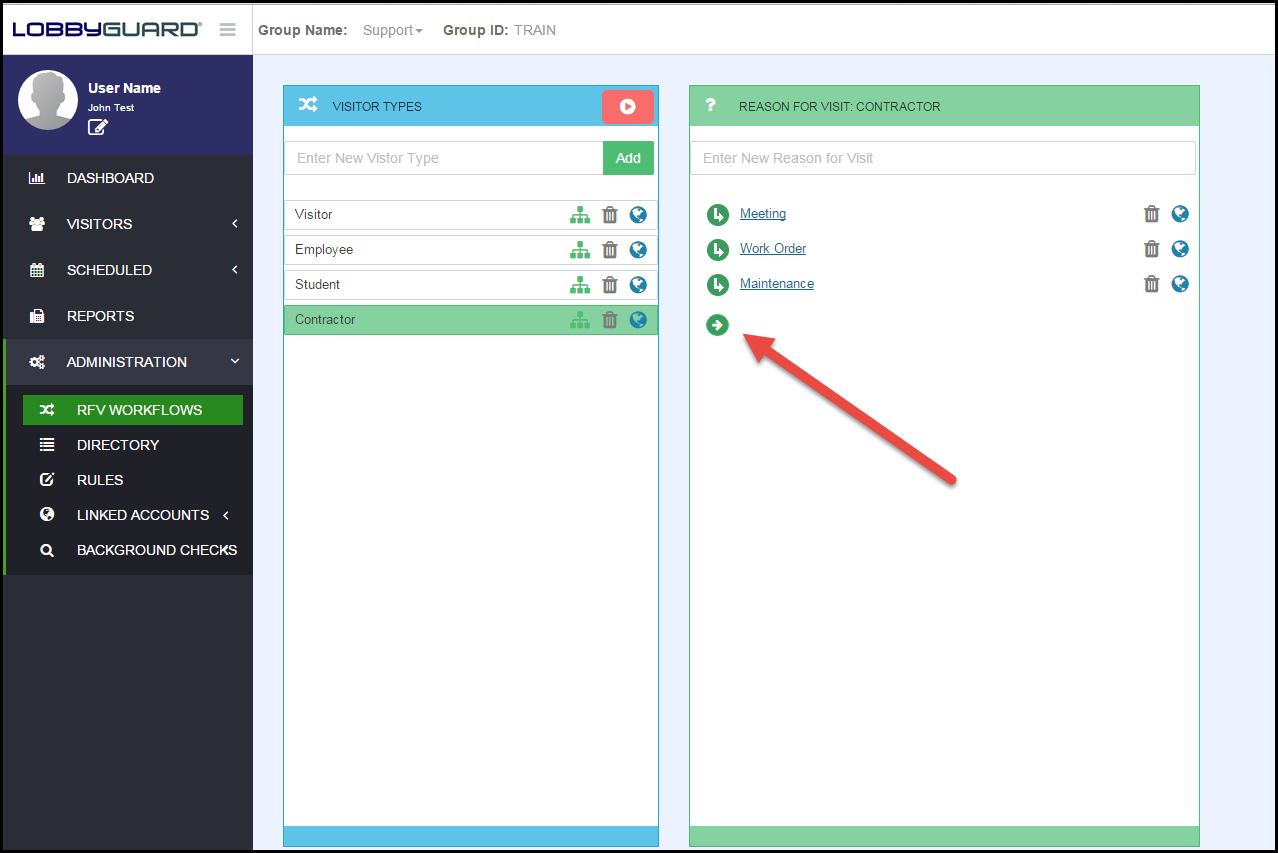
Click on a visitor type and the "REASON FOR VISIT" column will be visible as shown below. The selected visitor type will be highlighted in green. In the example below the "Contractor" visitor type was selected.
Enter a "reason for visit" for this visitor type in the field labeled "Enter New Reason for Visit". A reason for visit is a description of why this particular type of visitor might be in your building or facility. Click the straight right-pointing green arrow at the bottom of the list of reasons to add the new reason as highlighted below. Create as many reasons as needed for this type of visitor to be in your building.
Repeat this step until all visitor types have a complete list of reasons for visit.
Step 3: Create the Workflow
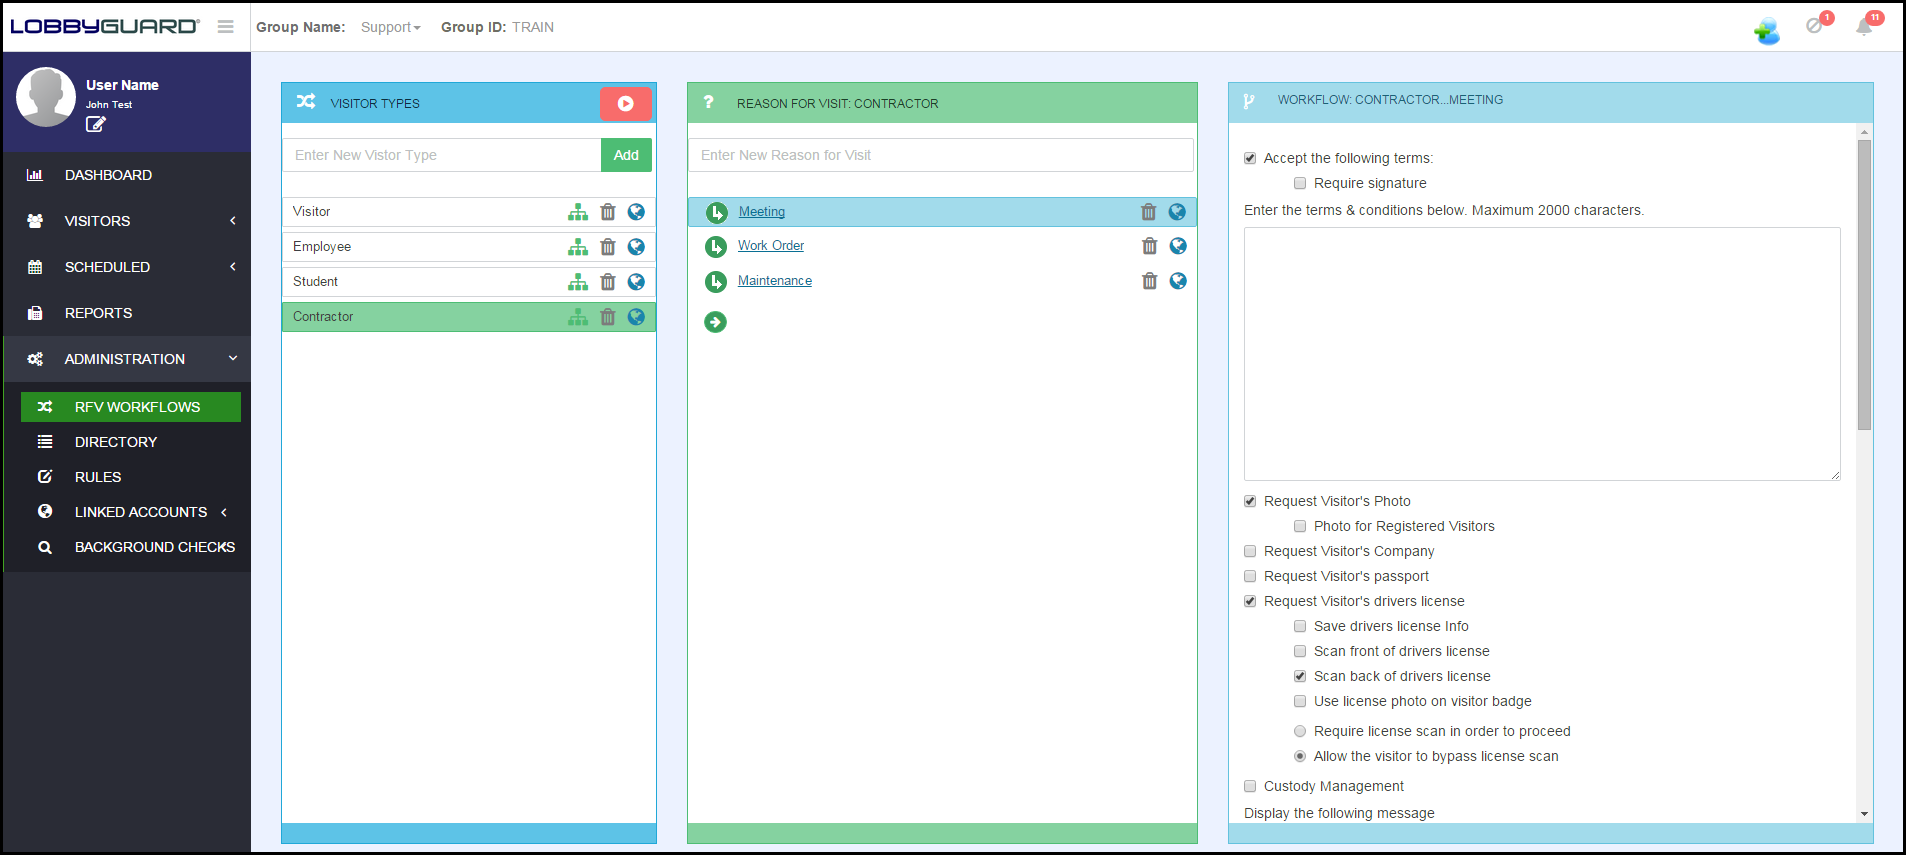
Click on a reason for visit and the "Workflow" column will be visible as shown below. The selected visitor type will be highlighted in green and the selected reason for visit will be highlighted in blue. In the example below the "Contractor" visitor type and "Meeting" reason for visit were selected.
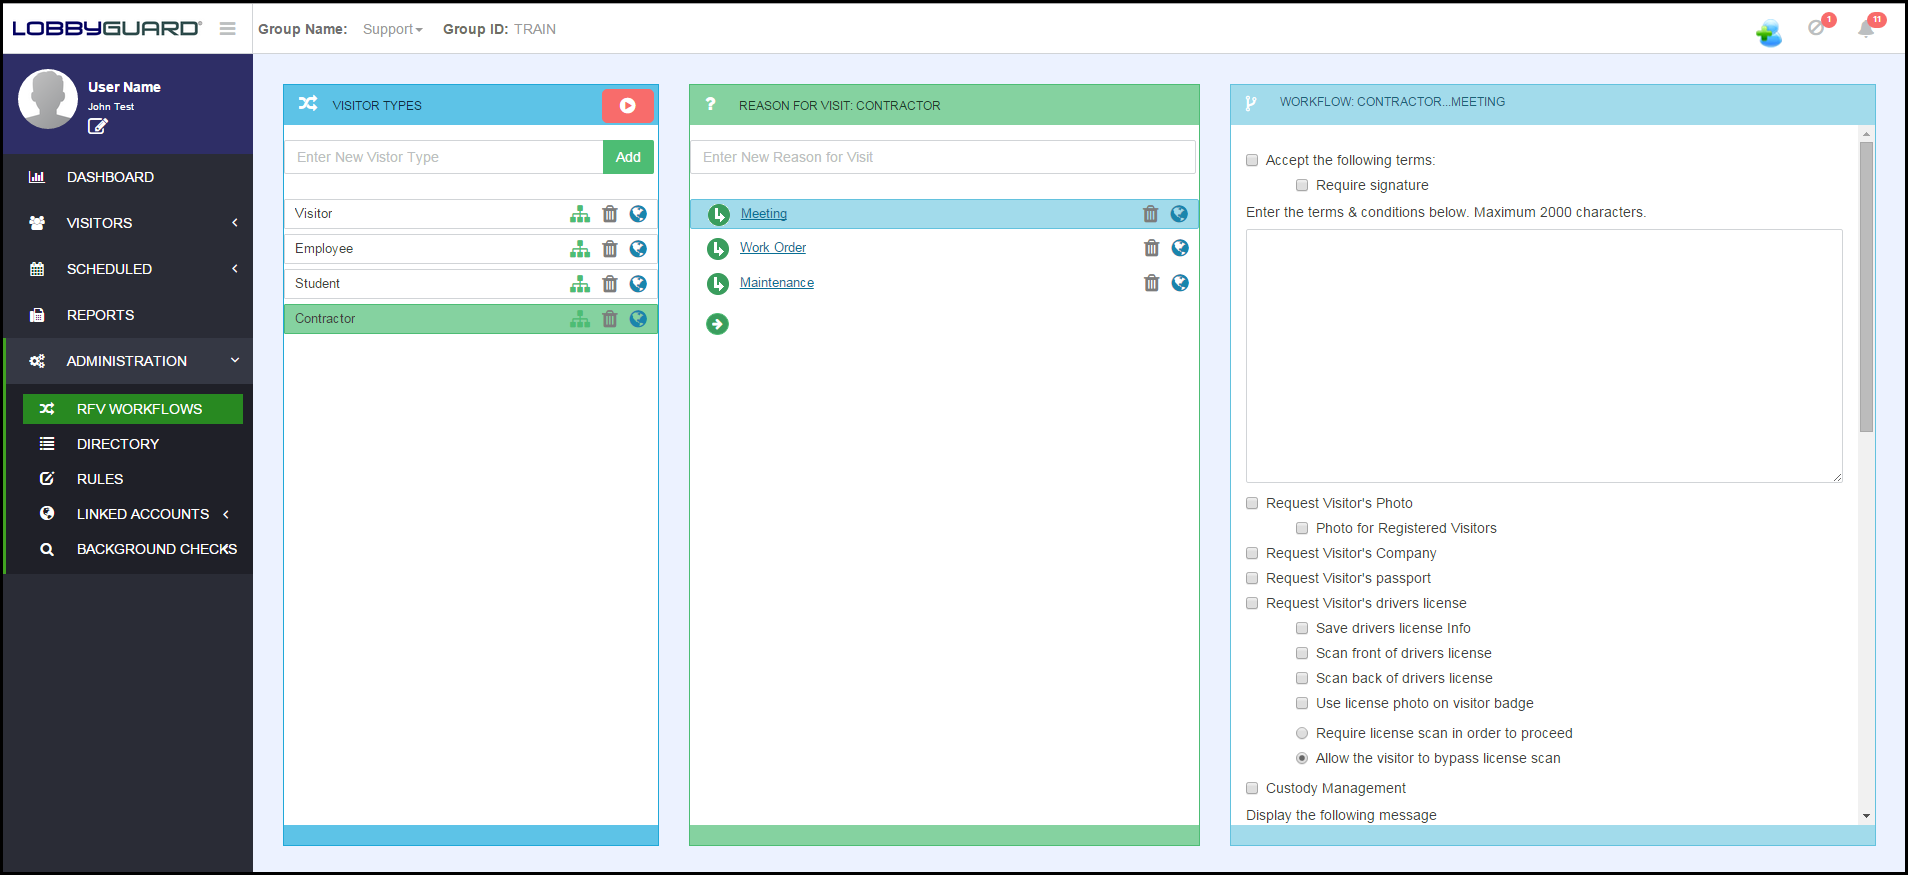
The Workflow column is where you determine what questions or inputs you wish to ask of a visitor who is signing in as a certain visitor type for a certain reason. In the example below we are setting up the workflow for a "Contractor" who is here for a "Meeting". You can choose from a number of workflow questions to ask this visitor; keep in mind the more information you wish to gather, the longer it will take this visitor to sign in.
Check the box to the left of each workflow item that you wish to enable for this workflow. When you are finished click the SAVE WORKFLOW button located at the bottom of the Workflow column. Repeat this step for each of the reasons for visit. Once this process is complete select another visitor type from the visitor type column and repeat the process until all visitor type/reasons for visit have an associated workflow.